

Creating beautiful toast messages for your Mac App
Create subtle and beautiful notifications for your Mac app.
Introduction
In this tutorial, you'll learn how to build a minimal floating toast message in SwiftUI for macOS, completely from scratch, step-by-step.
What is a toast message?
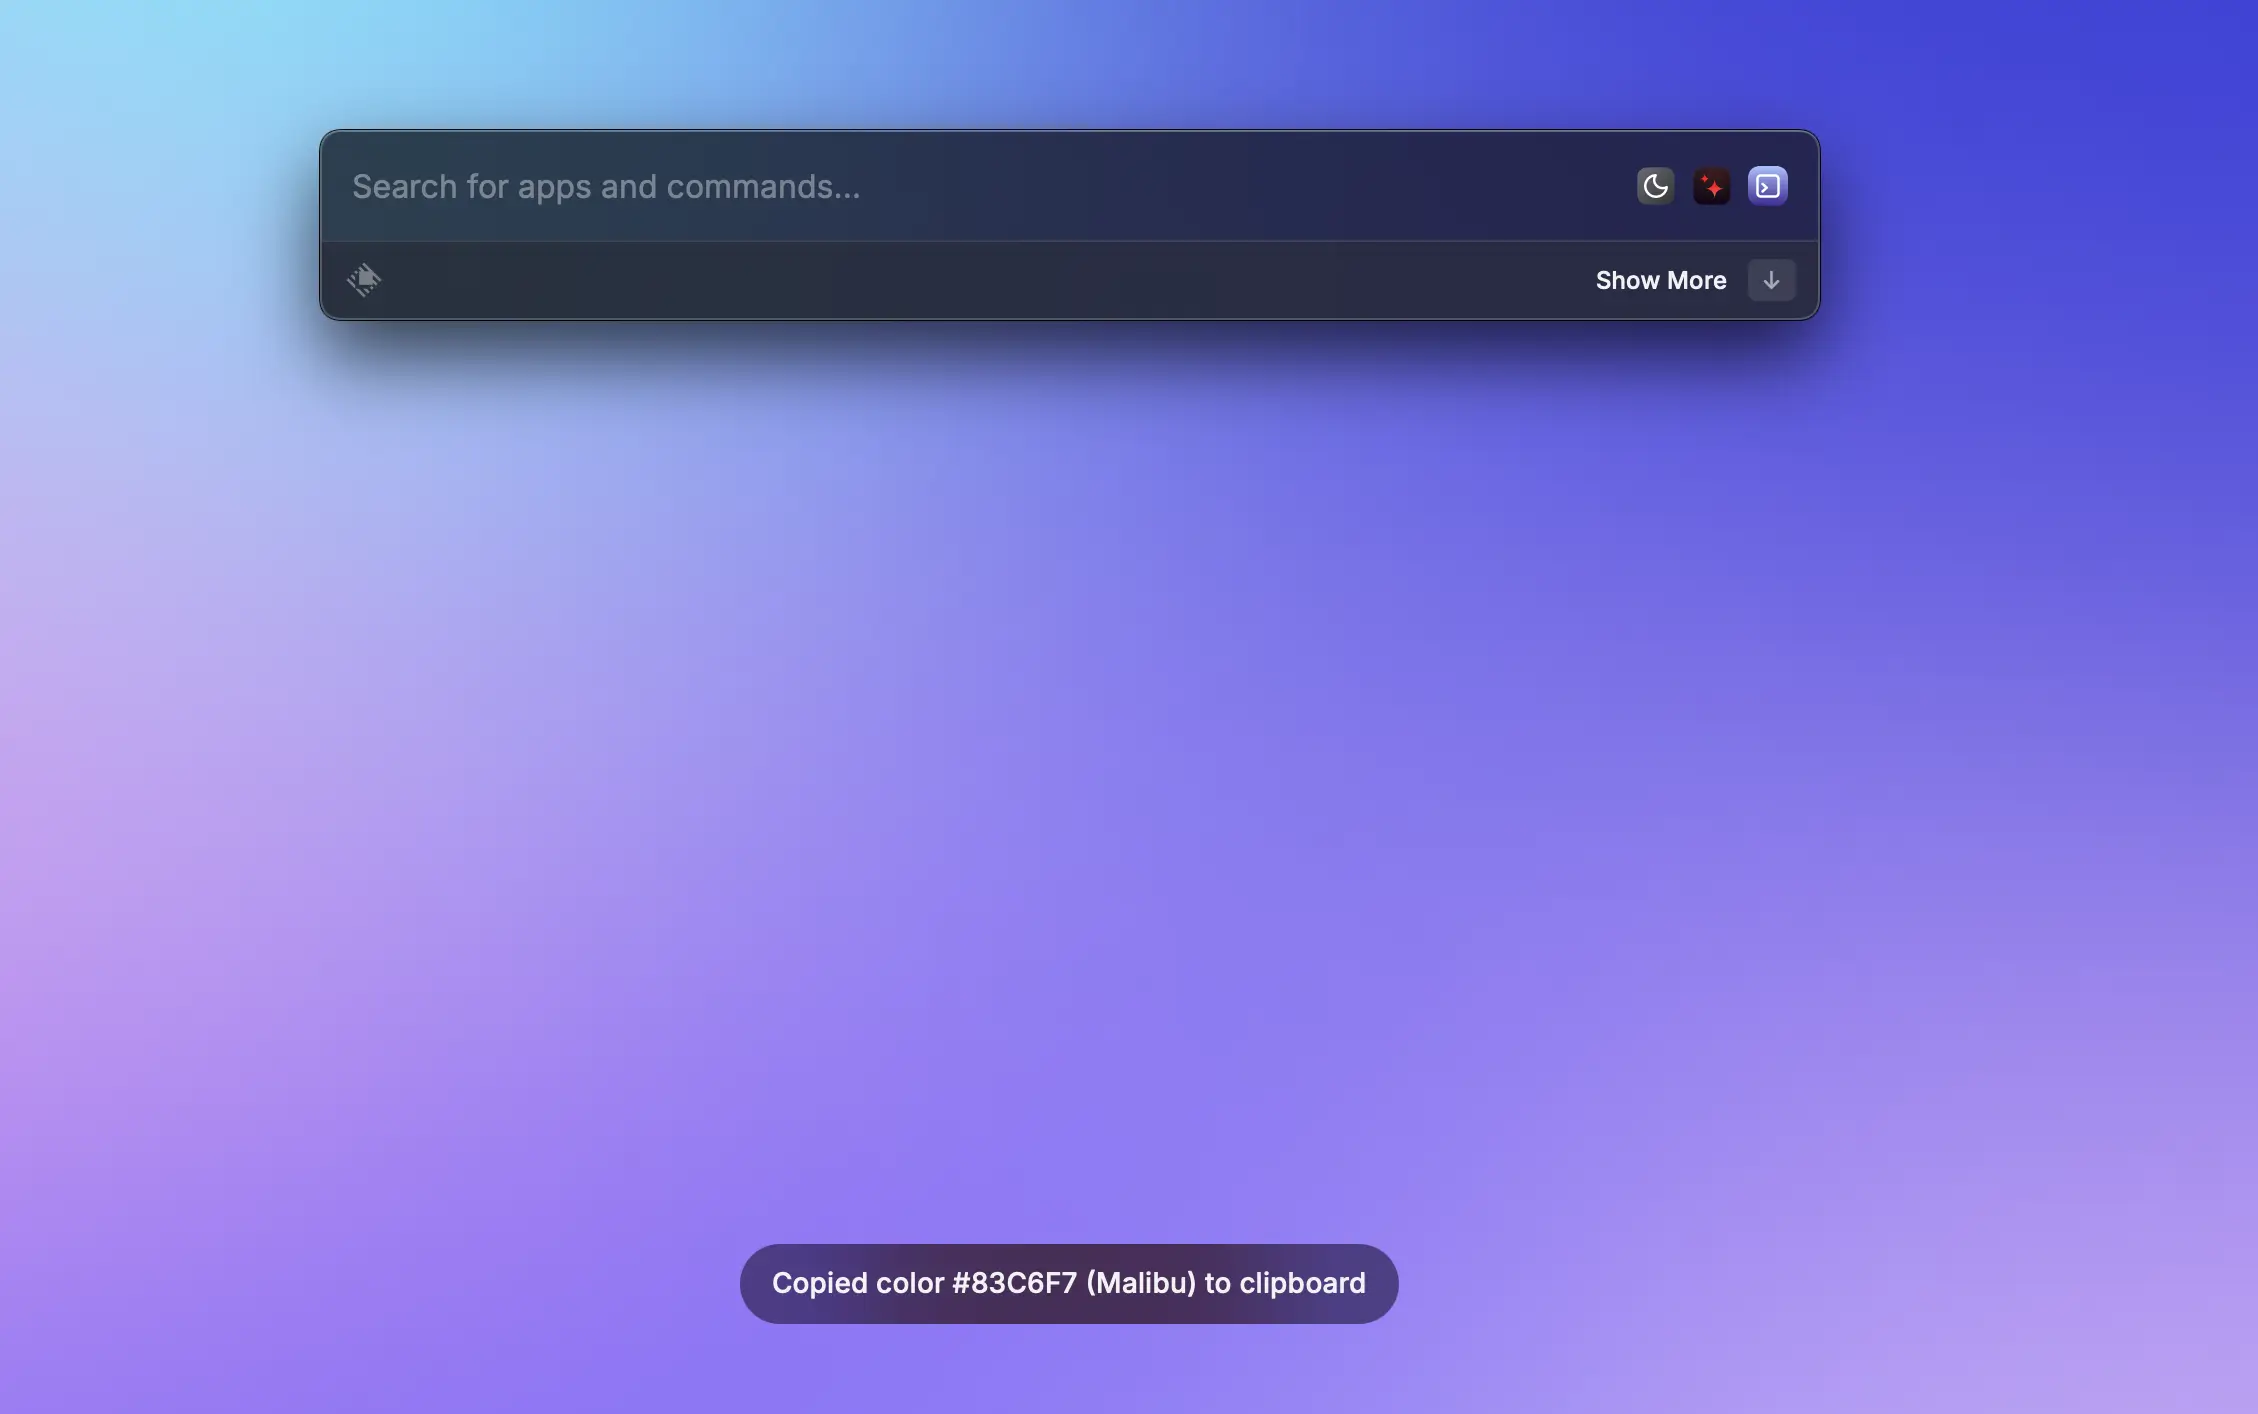
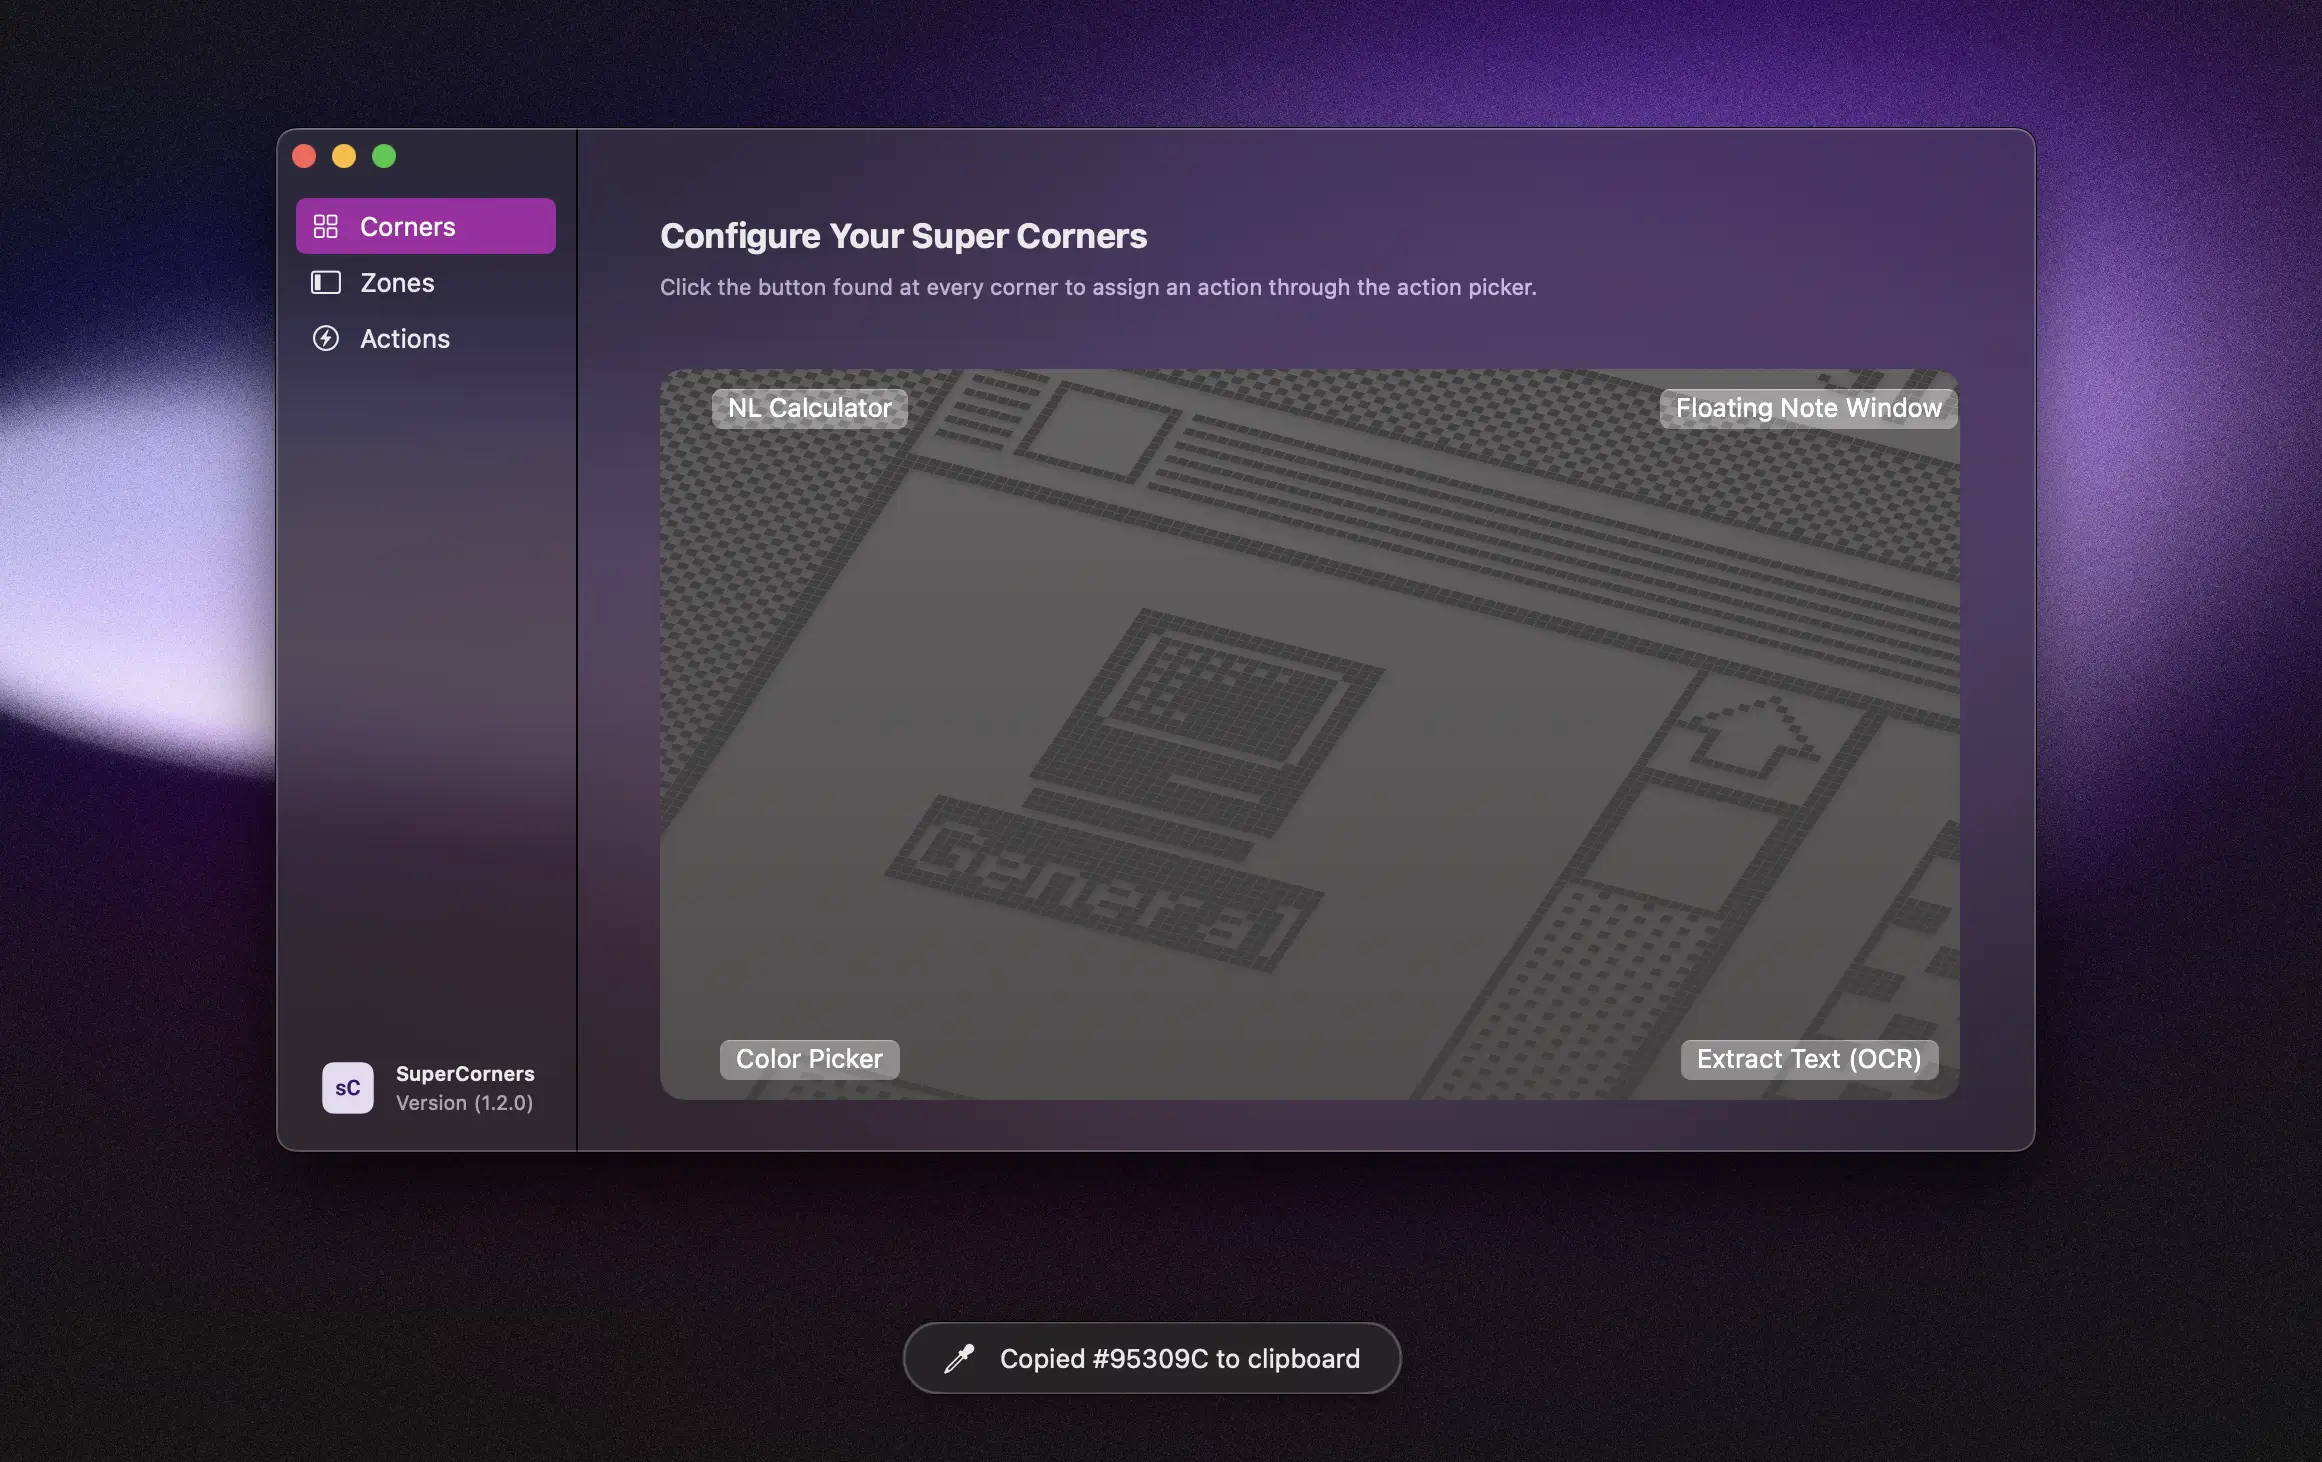
Toast messages are small pill shaped windows that float above other windows. Their often found in mobile apps and are a great way to provide quick visual feedback to the user, while staying non intrusive.
Most tutorials that cover this topic focus on iOS, so I wanted to provide a tutorial to build this for the desktop. Taking inspiration from Raycast, I want to show you how I built this myself, for my own app, SuperCorners.
Let's Begin
Before diving into the code, let’s lay out exactly what this toast system aims to accomplish:
- Minimal and clean: Just a subtle message and optional icon support
- Floats above all windows: It should be visible when your app is not active
- Reusable: We want something that we can easily configure and use across our app for different alerts
We're going to build this using a combination of SwiftUI and AppKit to build the actual floating window, and use a class to allow for multiple toasts to appear at once!
The Visual Aspect
The toast message should look modern and match the macOS styling. Thanks to SwiftUI this is pretty simple to achieve, as you'll see below:
- Start with a struct: Create aToastView struct that takes in a message and an optional icon.
- Use an HStack to arrange the icon (if present) and the message side by side.
- Next we can add a conditional check if there is an icon set, and add a few style modifiers.
- Add the text for the message. Set the alignment to .leading to keep it looking clean.
- Now we add some styling to the layout using padding and corner radius.
- To achieve a blur effect we can set the background to use the ultraThickMaterial.
- Finally we must add an overlay that uses RoundedRectangle and add a border using stroke. We use RoundedRectangle to tell SwiftUI to render a shape with rounded corners which uses the corner radius value to create the pill shape.
//
//  ToastNotification.swift
//  SuperCorners
//
//  Created by Daniyal Master on 2025-06-24.
//

import AppKit
import SwiftUI

struct ToastView: View {
    let message: String
    let icon: Image?

    var body: some View {
        HStack(spacing: 12) {
            if let icon = icon {
                icon
                    .resizable()
                    .scaledToFit()
                    .frame(width: 16, height: 16)
                    .foregroundColor(.primary)
            }
            Text(message)
                .multilineTextAlignment(.leading)
        }
        .padding(.horizontal, 20)
        .padding(.vertical, 10)
        .background(.ultraThickMaterial)
        .cornerRadius(20)
        .overlay(
            RoundedRectangle(cornerRadius: 20)
                .stroke(Color.primary.opacity(0.25), lineWidth: 1.5)
        )
        .frame(maxWidth: 300)
    }
}
Creating a Toast Window class
Now that we've built the toast view, we can move onto building a class that will handle displaying the toast, and overriding default macOS window behaviors that aren't ideal for this floating window.
To start, we’ll define our toast controller class and include two properties: one for the panel and one for the timer:
//
//  ToastNotification.swift
//  SuperCorners
//
//  Created by Daniyal Master on 2025-06-24.
//

class ToastWindowController {
    private var panel: NSPanel?
    private var timer: Timer?
}
We then define a function called showToast, which will be used to pass in optional custom messages and icons when calling the toast.
//
//  ToastNotification.swift
//  SuperCorners
//
//  Created by Daniyal Master on 2025-06-24.
//

class ToastWindowController {
    private var panel: NSPanel?
    private var timer: Timer?

    func showToast(message: String, icon: Image? = nil, duration: TimeInterval? = nil) {

    }
}
Next, we begin setting up the toast panel by creating the view and applying a custom style mask.
- Create an instance of the ToastView that will pass in the values set for the message and icon when calling the showToast function.
- Wrap the view in an NSHostingView and define its frame size. This tells AppKit how large the panel should be (it should be the same as in the ToastView that we created before).
- Create an NSPanel using the frame of the hosting view, and apply the .nonactivatingPanel style mask so that the toast appears without stealing focus from the currently active app.
//
//  ToastNotification.swift
//  SuperCorners
//
//  Created by Daniyal Master on 2025-06-24.
//

class ToastWindowController {
    private var panel: NSPanel?
    private var timer: Timer?

    func showToast(message: String, icon: Image? = nil, duration: TimeInterval? = nil) {
       if panel == nil {
            let toastView = ToastView(message: message, icon: icon, panel: nil)

            let hostingView = NSHostingView(rootView: toastView)
            hostingView.frame = NSRect(x: 0, y: 0, width: 300, height: 50)

            panel = NSPanel(contentRect: hostingView.frame,
                            styleMask: [.nonactivatingPanel],
                            backing: .buffered,
                            defer: false)
       }
    }
}
Once the panel is created, we can remove the default macOS window behaviors.
- Set the panel's content view to hostingView to embed the toast view we created before.
- Set the panel’s level to .floating so its visible above other windows.
- Set hidesOnDeactivate to false so it stays visible when you app is not active
- Add thess collection behaviors to make sure the toast window is visible outside of your app: .canJoinAllSpaces, .transient, .ignoresCycle
//
//  ToastNotification.swift
//  SuperCorners
//
//  Created by Daniyal Master on 2025-06-24.
//

class ToastWindowController {
    private var panel: NSPanel?
    private var timer: Timer?

    func showToast(message: String, icon: Image? = nil, duration: TimeInterval? = nil) {
          if panel == nil {
            let toastView = ToastView(message: message, icon: icon, panel: nil)

            let hostingView = NSHostingView(rootView: toastView)
            hostingView.frame = NSRect(x: 0, y: 0, width: 300, height: 50)

            panel = NSPanel(contentRect: hostingView.frame,
                            styleMask: [.nonactivatingPanel],
                            backing: .buffered,
                            defer: false)

            if let panel = panel {
                panel.contentView = hostingView
                panel.isFloatingPanel = true
                panel.level = .floating
                panel.backgroundColor = .clear
                panel.isOpaque = false
                panel.hasShadow = true
                panel.ignoresMouseEvents = false
                panel.hidesOnDeactivate = false
                panel.collectionBehavior = [.canJoinAllSpaces, .transient, .ignoresCycle]

                hostingView.rootView = ToastView(message: message, icon: icon, panel: panel)
            }
        }
    }
}
Positioning and Animating the Toast Panel
After creating the panel, we set a few position and animation settings to control its appearance and disappearance:
- We use screen frame to set the toast to appear at the center of your screen horizontally and towards the bottom vertically.
- Call .orderFrontRegardless() to ensure the toast is shown even if your app is not currently active.
- Set an initial alpha value of 0.
- Use NSAnimationContext to animate the panel’s alpha, creating a smooth fade in and out effect.
//
//  ToastNotification.swift
//  SuperCorners
//
//  Created by Daniyal Master on 2025-06-24.
//

class ToastWindowController {
    private var panel: NSPanel?
    private var timer: Timer?

    func showToast(message: String, icon: Image? = nil, duration: TimeInterval? = nil) {
        // Other Code Above

        if let screenFrame = NSScreen.main?.visibleFrame, let panel = panel {
            let x = screenFrame.midX - panel.frame.width / 2
            let y = screenFrame.minY + 100
            panel.setFrameOrigin(NSPoint(x: x, y: y))
            panel.alphaValue = 0
            panel.orderFrontRegardless()

            NSAnimationContext.runAnimationGroup({ context in
                context.duration = 0.3
                context.timingFunction = CAMediaTimingFunction(name: .easeInEaseOut)
                panel.animator().alphaValue = 1
            }, completionHandler: {
                DispatchQueue.main.asyncAfter(deadline: .now() + duration) {
                    NSAnimationContext.runAnimationGroup({ context in
                        context.duration = 0.3
                        context.timingFunction = CAMediaTimingFunction(name: .easeInEaseOut)
                        panel.animator().alphaValue = 0
                    }, completionHandler: {
                        panel.orderOut(nil)
                    })
                }
            })
        }
    }
}
Creating a Toast Helper
We need to create a Toast Helper that will allow us to create multiple variations of the same toast (such as a seperate success and error toast with different default messages and icons).
Below is an example of how I created seperate functions that can be used for success and error toasts in my app SuperCorners..
//
//  ToastHelper.swift
//  SuperCorners
//
//  Created by Daniyal Master on 2025-06-24.
//

import SwiftUI

func showSuccessToast(_ message: String = "Action Completed", icon: Image? = nil) {
    DispatchQueue.main.async {
        let toast = ToastWindowController()
        toast.showToast(
            message: message,
            icon: icon ?? Image(systemName: "checkmark.circle.fill")
        )
    }
}

func showErrorToast(_ message: String = "Action Failed", icon: Image? = nil) {
    DispatchQueue.main.async {
        let toast = ToastWindowController()
        toast.showToast(
            message: message,
            icon: icon ?? Image(systemName: "x.circle.fill")
        )
    }
}
Thats it! You can now use these toast messages across your app!
Displaying your Toasts
Using the example above, we can display our success or error toasts like this:
showSuccessToast()
showErrorToast("Error: No files found in folder")
showSuccessToast("Caffeinate Turned Off", icon: Image(systemName: "powerplug.fill"))
Conclusion
Using this simple toast system you can easily add different toasts across your app for different alerts. It's a clean and unobtrusive way to provide visual feedback to the user. If you want to add features like dismiss on click, and create settings to control toast behaviors, checkout the full code here.
Maybe in the future I'll turn this into a Swift Package that you can easily drop right into your Mac app. But for now, happy coding!
Published: 2025-07-15